Ray 插件用户指南
简介
Ray 插件用于优化 Ray 集群的部署体验:既减少 YAML 编写量,又支持一键部署 Ray 集群。
Ray 插件工作原理
Ray 插件会完成以下工作:
- 配置 Ray 集群中 head 与 worker 节点的启动命令。
- 为 Ray head 节点开放三个端口(GCS、Ray Dashboard、Client Server)。
- 创建 Service,将流量映射到 head 节点容器端口(例如提交 Ray Job、访问 Ray Dashboard 与 Client Server)。
说明
- 本插件基于 Ray CLI(Command Line Interface),本指南使用 官方 Ray Docker 镜像。
- 使用 Ray 插件时必须同时启用 svc 插件。
Ray 插件参数
参数说明
| 编号 | 名称 | 类型 | 默认值 | 必填 | 说明 | 示例 |
|---|---|---|---|---|---|---|
| 1 | head | string | head | 否 | Volcano Job 中 head Task 的名称 | --head=head |
| 2 | worker | string | worker | 否 | Volcano Job 中 worker Task 的名称 | --worker=worker |
| 3 | headContainer | string | head | 否 | head Task 中主容器的名称 | --headContainer=head |
| 4 | workerContainer | string | worker | 否 | worker Task 中主容器的名称 | --workerContainer=worker |
| 5 | port | string | 6379 | 否 | 为 GCS 开放的端口 | --port=6379 |
| 6 | dashboardPort | string | 8265 | 否 | 为 Ray Dashboard 开放的端口 | --dashboardPort=8265 |
| 7 | clientServerPort | string | 10001 | 否 | 为 Client Server 开放的端口 | --clientServerPort=10001 |
示例
本指南参考 RayCluster 快速入门 中的步骤。
首先,使用下方 YAML 清单创建 Ray 集群。
- 关于 Ray 集群的更多概念,请参阅 Ray Cluster Key Concepts。
- 关于如何组建 Ray 集群的更多说明,请参阅 Launching an On-Premise Cluster。
apiVersion: batch.volcano.sh/v1alpha1
kind: Job
metadata:
  name: ray-cluster-job
spec:
  minAvailable: 3
  schedulerName: volcano
  plugins:
    ray: []
    svc: []
  policies:
    - event: PodEvicted
      action: RestartJob
  queue: default
  tasks:
    - replicas: 1
      name: head
      template:
        spec:
          containers:
            - name: head
              image: rayproject/ray:latest-py311-cpu
              resources: {}
          restartPolicy: OnFailure
    - replicas: 2
      name: worker
      template:
        spec:
          containers:
            - name: worker
              image: rayproject/ray:latest-py311-cpu
              resources: {}
          restartPolicy: OnFailure
应用后,将创建一个由 head node 与一个或多个 worker node 组成的 Ray 集群。
kubectl get pod
NAME                       READY   STATUS    RESTARTS   AGE
ray-cluster-job-head-0     1/1     Running   0          106s
ray-cluster-job-worker-0   1/1     Running   0          106s
ray-cluster-job-worker-1   1/1     Running   0          106s
除集群外,还会创建 ray-cluster-job-head-svc Kubernetes Service 资源(ray-cluster-job 的 Service 由 svc 插件创建)。
kubectl get service
NAME                       TYPE        CLUSTER-IP     EXTERNAL-IP   PORT(S)                       AGE
ray-cluster-job            ClusterIP   None           <none>        <none>                        3s
ray-cluster-job-head-svc   ClusterIP   10.96.184.65   <none>        6379/TCP,8265/TCP,10001/TCP   3s
获得 Service 名称后,可通过端口转发访问 Ray Dashboard(默认端口 8265)。
# 在另一个终端中执行。
kubectl port-forward service/ray-cluster-job-head-svc 8265:8265 > /dev/null &
Dashboard 可访问后,向 RayCluster 提交作业:
# 以下作业的日志将显示 Ray 集群的总资源容量(包含 2 个 CPU)。
ray job submit --address http://localhost:8265 -- python -c "import ray; ray.init(); print(ray.cluster_resources())"
Job submission server address: http://localhost:8265

-------------------------------------------------------
Job 'raysubmit_W8nYZjW4HEFG6Mqa' submitted successfully
-------------------------------------------------------

Next steps
  Query the logs of the job:
    ray job logs raysubmit_W8nYZjW4HEFG6Mqa
  Query the status of the job:
    ray job status raysubmit_W8nYZjW4HEFG6Mqa
  Request the job to be stopped:
    ray job stop raysubmit_W8nYZjW4HEFG6Mqa

Tailing logs until the job exits (disable with --no-wait):
2025-09-23 14:58:49,442	INFO job_manager.py:531 -- Runtime env is setting up.
2025-09-23 14:59:00,106	INFO worker.py:1630 -- Using address 10.244.2.42:6379 set in the environment variable RAY_ADDRESS
2025-09-23 14:59:00,144	INFO worker.py:1771 -- Connecting to existing Ray cluster at address: 10.244.2.42:6379...
2025-09-23 14:59:00,161	INFO worker.py:1942 -- Connected to Ray cluster. View the dashboard at http://10.244.2.42:8265
{'memory': 16277940225.0, 'node:10.244.4.41': 1.0, 'object_store_memory': 6976260095.0, 'CPU': 30.0, 'node:10.244.3.42': 1.0, 'node:10.244.2.42': 1.0, 'node:__internal_head__': 1.0}

------------------------------------------
Job 'raysubmit_W8nYZjW4HEFG6Mqa' succeeded
------------------------------------------
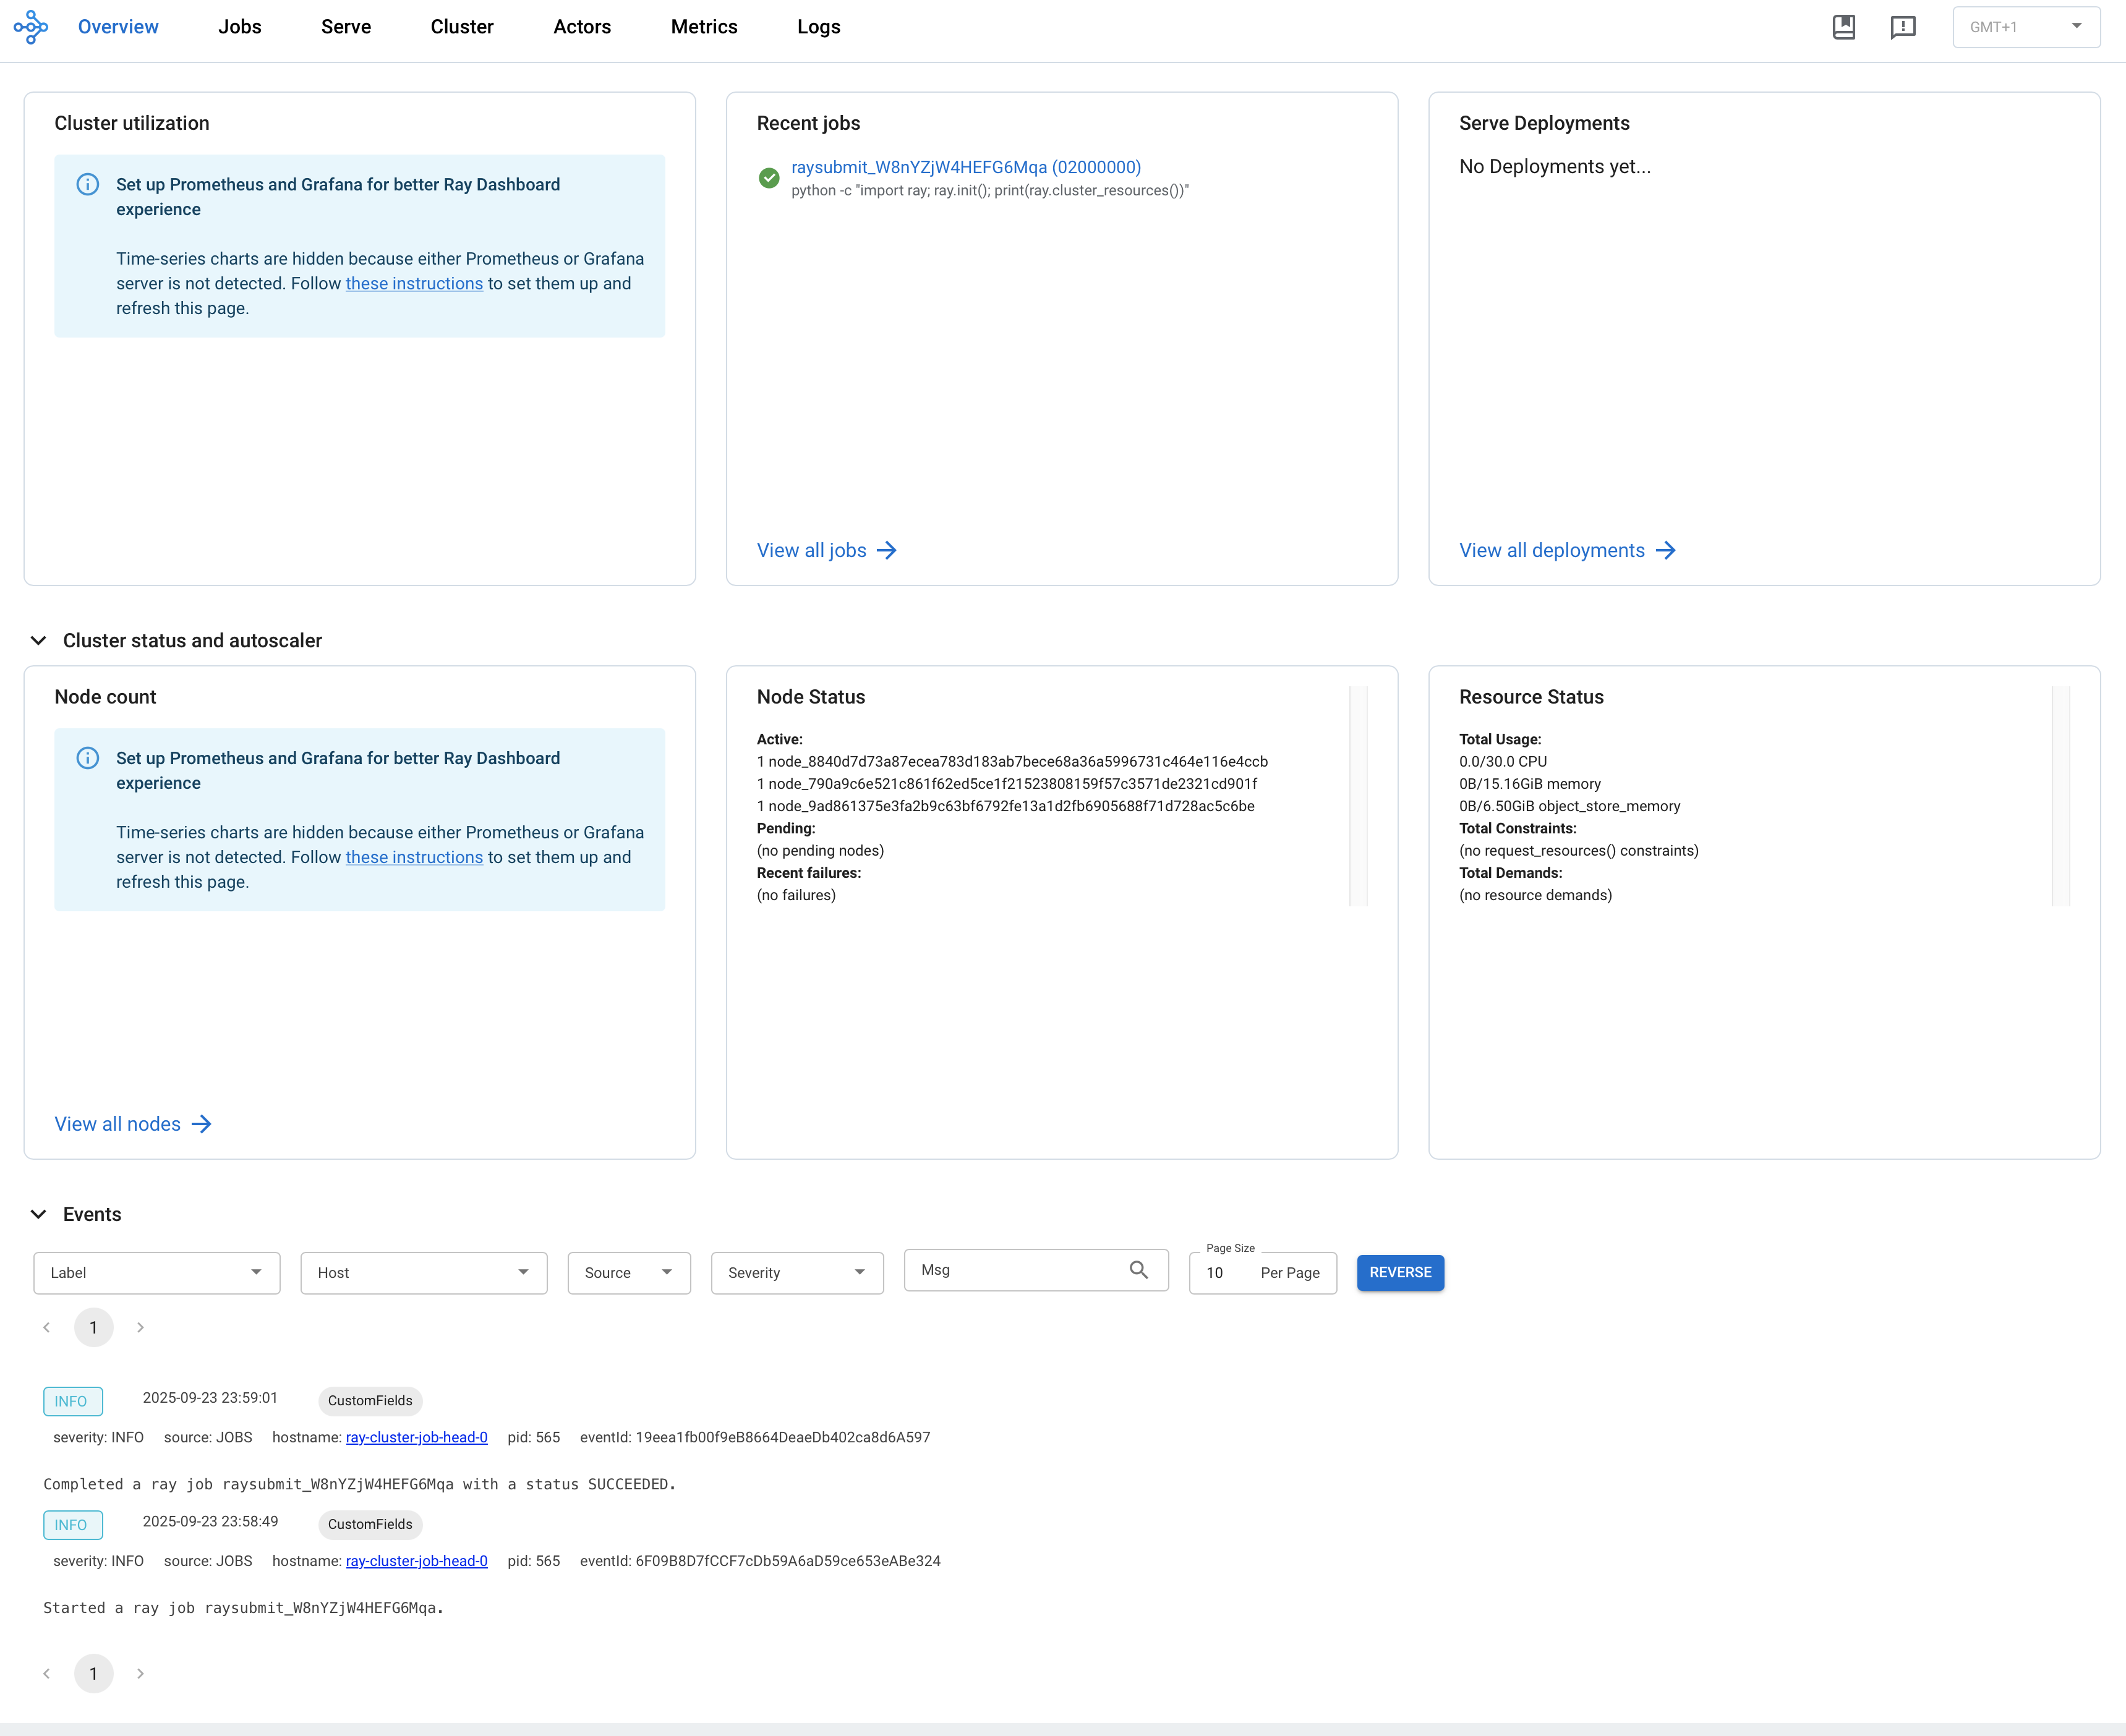
在浏览器中访问 ${YOUR_IP}:8265 打开 Dashboard,例如 127.0.0.1:8265。可在 Recent jobs 面板中看到上方提交的作业,如下图所示。